Learn how to Style a Photo Shoot
A Step by Step Guide
to Earning some Serious Photography Style Cred
Whenever I book a shoot one of the first questions that I’m asked is, “What should I wear?”. That is a completely legit question considering that how you decide to style your photo shoot will be captured forever. No pressure or anything. You don’t want to look back on your photos 20 years down the road & wonder what the heck you were thinking when you chose that outfit & how that could have ever been the style. I totally get it. I mean, I have trouble choosing what I’m going to wear on a daily basis, let alone photos that will be captured until the end of time.
I’m going to share with you some of the secrets I’ve learned from my previous career as a Fashion Designer. For 15 years, my job was to create a line of clothing 3 times a year, which included style, color & concept. I had to be a story teller. I’ve taken the lessons I learned from being in the Fashion Industry & integrated the same discipline into my photography. I’m here to teach you how you can do it, too.
First things first, let’s determine your theme.
A theme is the easiest place to start & really helps determine the style & mood of what your photos will look like. Think about what inspires you most & what makes you feel the happiest. Is it a destination? Could it be your favorite place to visit in the winter months? Maybe you’re inspired by modern minimalism or are more attracted to fun quirky colors. Find an image of whatever it is that you are most drawn to – that thing or place or person – & work from there.
Check out some of these ideas I found on Pinterest (which is always a good place to start):
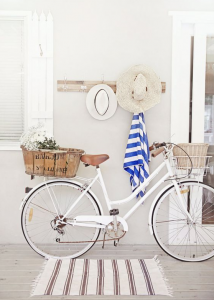
Photo Inspiration – Beachy. Laid Back. Chic. Minimal.
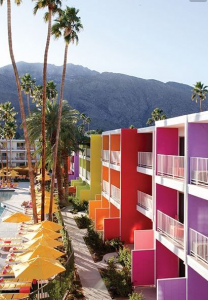
Style Inspiration – Fun. Quirky. Modern.
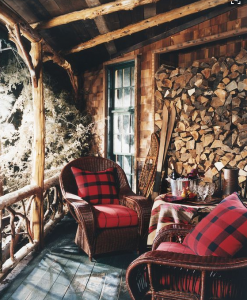
Photo Style Inspiration – Rustic. Cozy. Casual.
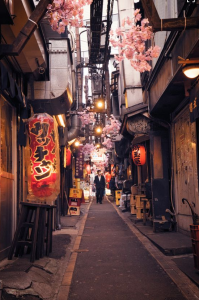
Photo Style Inspiration – Dark. Moody. Urban.
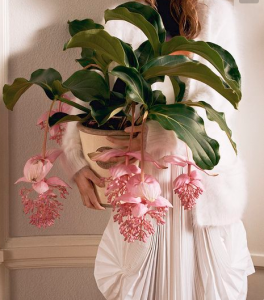
Photo Style Inspiration – Elegant. Clean. Pretty. Romantic.
You can basically get ideas from anything that you find inspiring. These are just a few examples of the different moods that can be translated into your photos. It’s cool like that!
Ok, so now let’s talk Color, shall we?
Naturally, you want to be wearing colors that look good on you & fit in with your personal style. When you choose an image that inspires you most, what you’ll also notice is that you chose that image because you also like the colors within it. If you are taking portraits with your whole family, you will want to avoid being too “matchy-matchy”. So, my suggestion is to pull colors from that image, probably about 3 – 5 colors & work from there. You might think that the colors in the image would never look good on you, but the colors don’t have to be exact. Instead, find the “tones” of the colors within the inspiration photo to work with.
Here I’ll take 2 of the inspiration photos from above & pull out the colors from each one so that you know exactly what I’m talking about.
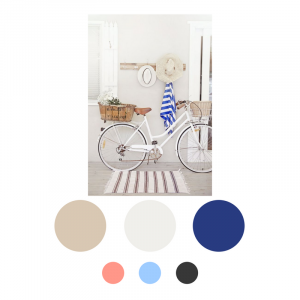
Color Inspiration – Cool shades of blues & warm neutrals with a pop of orange
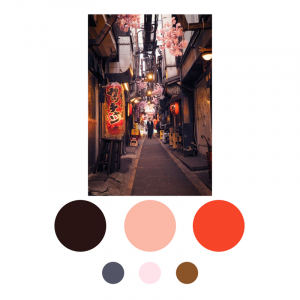
Color Inspiration – Warm tones of reds & corals with deep, rich accent colors
Notice that these are two very different images that tell a very different story. The top image feels really fresh & easy. I added the pop of orange because the colors in the inspiration photo were limited. I chose orange because of how it compliments with blue. You can never really go wrong with adding complimentary colors to your color story. You just have to make sure that it’s really fits the original look you were going for.
The bottom image is a lot sexier & has a very intense, dark aesthetic. The colors in both images can definitely be adjusted to fit your style & what you feel looks best on you.
And the next BIG question is – What the heck are you going to wear?
Ok, so this is the fun part. It might seem kind of overwhelming, but you can just relax because I’m going to share with you some creative ways to get around the style dilemma. We are not here to get stuck on what you don’t have in your closet or throw down tons of dough in a frantic shopping spree to try & get the perfect looks. Trust me, we’ll get there anyway. What you really need to do is think outside of the box & keep an open mind.
Again, I’ll use the two chosen images above to walk you through some cool, inexpensive ideas to get the look you really want.
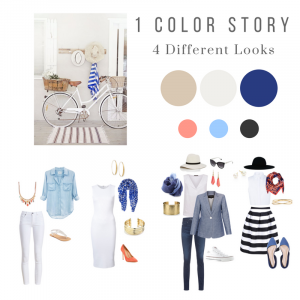
Wardrobe Inspiration 1
These boards are examples of different ways to incorporate your own personal style from the images that you took from your original inspiration.
Let me break this down for you.
From left to right:
-
Look 1. This style is for the casual girl. A simple chambray shirt & white jeans. The shirt is soft & easy. The coral necklace dresses the outfit up a bit to make your photos look a little more special.
-
Look 2. This style is for the more dressy, elegant girl. Just take a white dress & pop the colors into your accessories. Done.
-
Look 3. This style has a hip, edgy traveler vibe. Again, the colors are in the accessories.
-
Look 4. I love this style. It is Parisian Chic. The blue flats are subtle, but the orange & navy scarf add a lot of personality.
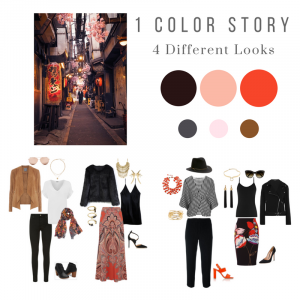
Wardrobe Inspiration 2
I just love how this style board is so different from the one above it. This one is a lot more edgy & urban in mood & feel.
Here is the breakdown:
From left to right:
-
Look 1. This style is for the casual girl that wants to keep things a little more simple. Jeans & a T-Shirt, so easy. Pump up the look with the dramatic scarf & a layering jacket.
-
Look 2. This style is for the BoHo Chic girl that is really into making a statement. The skirt pulls all the colors together. Print patterns are a great way to spice up a look, but just make sure that you don’t over do it. Too much pattern can be very distracting to the eye.
-
Look 3. This style is for the artsy girl. The color is in the accessories. A hat is a great prop to use in photos as it can come off or stay on which changes things up a lot. It’s also a playful tool in many different situations like engagement photos.
-
Look 4. This style is for the ultra urban glamour girl. Again, the skirt pulls in all the colors. The pieces are simple & classic, but really has a sexy appeal.
Hair & Make-Up Do’s & Don’ts
Whether you’re a make up pro, someone who doesn’t know the first thing about how to use the stuff or someone who is just naturally gorgeous without it, you will definitely need make up in your photos. How you decide to style your hair & make up will pull your whole look together. It will give you confidence & help you feel a lot less nervous in front of the camera.
I do not, however, recommend over doing it. Too much make up can make you look clown-like & fake. You want your make up to look natural in the photos, even if you’re wearing it for a dramatic effect. Having said that, make up can definitely be one of your best props. I just love bright daring red lips or dramatic wing tipped eyes. It’s not right for every person or every situation, but it can be a total game changer if it works for your look.
There are so many great tutorials online for step by step make up How-To’s. But no worries, if you just can’t seem to get the hang of it I would suggest that you find a business in your area that offers hair & make-up services. I firmly believe that you need to have a trial done before the day of your photos. Believe me when I say that I had a bad experience with an “expert” giving me a trial service before my wedding. It was not at all what I wanted & so I ended up doing it myself. Boo. But at least I figured it out before my wedding day.
Another thing you can do is go to Sephora, Ulta or any make up counter in a department store & they are usually happy to practice their fab skills on beauties like you & they are also really good about teaching cool techniques for applying make up properly.
For your hair, I recommend that you try different styles with your outfit. Weather you wear it up or down is entirely up to you, but trying it out first is the key. You don’t want to go into panic mode on the day of your photo shoot because your hair just won’t cooperate. Look to Pinterest for inspiring hair do ideas.
Find the right Setting for your Fabulous Photo Shoot
Ready to rock the shot? Ok, so you can’t fly down to the French Riviera to take your photos. Or maybe you can & if that’s the case then you should consider taking me along with you!
Sometimes you can get away with doing photos in your own back yard, but I usually suggest you find a place where you will not be surrounded by cars, people, houses or telephone wires. I mean, sometimes it’s unavoidable, but try your best to keep those things out of your photos unless that’s the particular look you’re going for. Otherwise, it’s a horrible distraction.
If you are going to shoot photos outdoors consider the position of the sun at the time of day you are going to shoot. Midday sun is often times too bright & can create a lot of unnecessary & harsh shadows. However, if it’s overcast outside then you can do it virtually any time of the day that you want. Overcast days give you beautiful, filtered light that will make your photos soft & more diffused. Personally, I also like rainy & snowy days. Rain & snow make great props.
Maybe you prefer your photos indoors? That’s totally cool,too. I would suggest finding a place that has natural indirect lighting – unless you’re a master at the flash. Personally, I prefer natural lighting, but I also know that some of you have some serious skill with a flash, so I know that you can make it work.
The time of day you choose is critical because it will either help or hinder the look of your photos. Let’s say you are going for a dreamy, romantic vibe, then the lighting at the end of the day, right after the sun goes down (I like to call it the magic hour) is best. You gotta time it perfectly because it happens fast!
Enjoy this Creative Process
Last but not least, have fun. It can be really intimidating to try new concepts & ideas, but it will also open your eyes to new possibilities that you may not have thought of before. I hope that approaching a photo session from the perspective of an experienced Fashion Designer will open you up to a new & exciting way to style your photo shoots.
I’d love to hear what you think. Did you find these tips helpful? Let me know in the comments section below.
Have the best day ever & remember…
Don’t miss the Moment!
Cheers,
Ruby



[…] If you’re interested in diving a little bit deeper into how you can style out the perfect outfit for your shoot check out this post. […]
[…] a photo shoot & you need help styling your look. I’ve got just the Blog post for you! Here is a guide to help you learn how to create a stylishly curated photo shoot from concept & color to […]